But I have made a few and folks who are confused with the stitches often ask me to help so here goes...
In this example, I am only casting on 10 stitches (via longtail cast-on) just to show you how this goes.
So go ahead and cast-on. I’ll wait... Oh yeah, click the pictures to make them bigger.
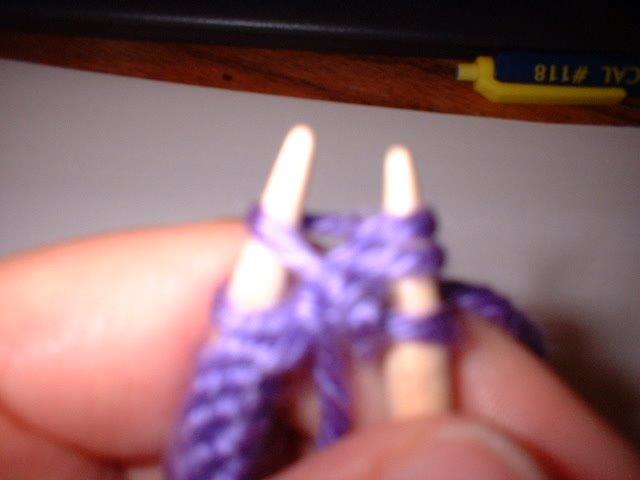
Knit the 1st stitch. (Call this stitch 1)
Slip the next stitch from the left-hand needle to the right as if you were purling and leave it there. (Call this stitch 2)
Knit the next stitch. (Call this stitch 3)
Take your left-hand needle (LHN) and from the front put it through stitch 2.

Now take your working yarn from the back and loop it over the right-hand needle (RHN) counter clockwise.

Okay, now take your LHN that is resting under stitch 2 and lift stitch 2 up and over stitch 3 and the yarn you just looped over the RHN.
Now drop it.
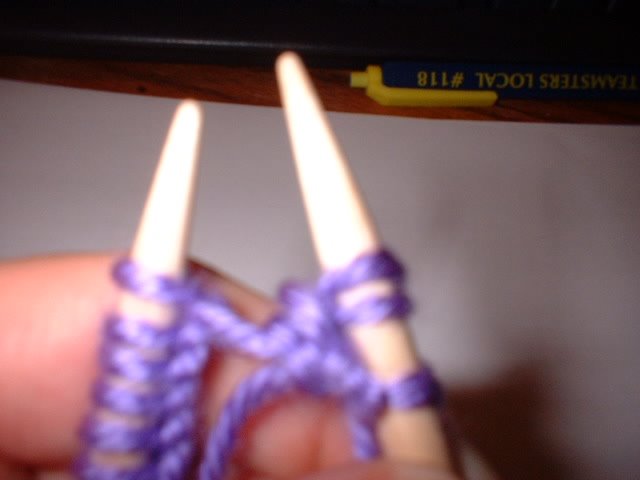
Should have 3 stitches on the RHN now, yes? I know its a lot of words but once you do it you’ll understand what I describing.
Let's repeat this sequence with the next stitches...
slip stitch 4 purl wise, knit stitch 5, stick you LHN under stitch 4 from the front, loop your yarn around your RHN, lift stitch 4 up and over stitch 5 and the looped yarn and drop. Now you’ve done this stitch process twice. Keep going until you are at the last stitch on the left-hand needle and knit it. You'll notice that the stitches bunch together in 2s. That's what it is supposed to look like:
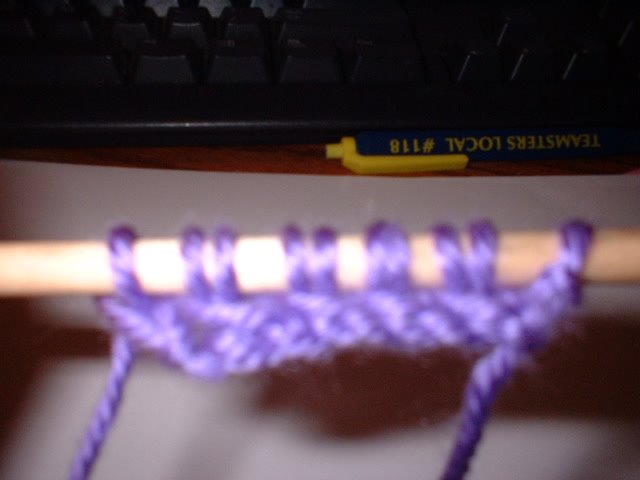
You have completed row 1, so flip your work and let’s tackle row 2.
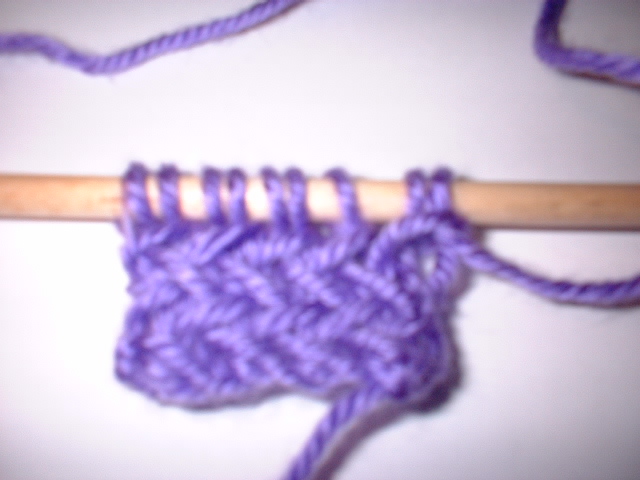
ROW 2
Bring your yarn to the front because we are purling. Purl two stitches together by slipping your RHN under stitches 1 and 2 on the LHN.

BEFORE you drop the stitches, I want you to poke your RHN between stitches 1 and 2 so that you can purl stitch 1 again.

Now drop the stitches. Still with me? If yes, you now know how to knit the entire purl row. It is exactly the same all the way across. So when you are done with row 2, flip your work and tackle row 3, which is the exact same as row 1. Then you get this...the lovely cross-hatch, herringbone-like pattern!
That’s all there is to it. Easy, once you are not confused by the stitches. I wish I could make a little video for you, but I’m not that equipped. Let me know how you do :)
2 comments:
THANK YOU!!! This makes it much clearer! This is great - I was so confused by the original instructions.
Thank you sooo much for this, I now have 2 fab scarves. I honestly thought I was losing it until I found this tutorial..thanks
Post a Comment